
Whether you’re a turkey, ham, or even roasted cauliflower family, no Thanksgiving dinner is complete without gravy. Delicious for appetizers, sides, and mains, the right gravy is an absolute must in the holiday spread. So, we don’t want you taking any chances this year; that’s why we developed this perfect gravy recipe, sure to satisfy even the strictest of gravy critics. Your holiday deserves nothing less than the very best—here’s how to achieve it.
What People Are Saying:
“First time trying and it came out awesome!!! Very delicious 😋” – GreenBug
“This is the best gravy I’ve ever had!!!!!!” – OrangeFlask
What Is Gravy?
At its core, gravy is a thickened sauce made from meat drippings, stock or broth, and seasonings. My gravy starts with a classic roux—equal parts fat (in this case butter) and flour, cooked in a skillet to a golden, nutty-smelling paste—which serves as the thickening agent for the drippings and stock.
How To Make Gravy
INGREDIENTS
- Butter: Butter is a wonderful fat for roux. As the roux cooks, the milk solids in the butter begin to brown, infusing the roux with all sorts of nutty brown-butter flavors.
- Flour: Flour provides the starch for our roux. When this starch binds with butter fat during cooking, we get a thickener that’s ideally suited to giving our gravy the creamy-velvety texture we want.
- Drippings: As your turkey roasts, it will render a ton of fat. Don’t—I repeat, don’t—pour that fat into the garbage. That fat = drippings! And those drippings are packed with flavor that you need for a perfect Thanksgiving gravy.
- Chicken Broth or Stock: If you have homemade stock socked away in the back of your freezer, now’s the time to use it; otherwise, low-sodium chicken broth will more than do the trick.
- Herbs: Something about the combination of woodsy sage and citrusy-minty thyme always evokes the holidays for me. I prefer the bright flavors of fresh herbs in my gravy, but feel free to substitute dried herbs if you like.
STEP-BY-STEP INSTRUCTIONS
We’ll start by making our roux. You’ll need a small saucepan and a whisk for this. Melt the butter in the pan over medium heat until it melts and foams. Sprinkle in the flour and cook, whisking, until a nutty-smelling golden paste forms, about 1 minute. Roux can burn easily, so it’s important to whisk constantly to prevent the mixture from sticking to the bottom of the pan and scorching (if you do happen to burn the roux, just toss it and start again; all you’re out are a few tablespoons of butter and flour). Now we’ll add our drippings, but don’t pour them all in at once! To prevent lumps from forming, it’s important to gradually pour in the drippings, whisking all the while. Bring the mixture to a boil, then reduce the heat and simmer, whisking occasionally, until slightly thickened, about 5 minutes; this step activates the thickening powers in the roux.

While whisking constantly (to prevent lumps from forming), pour in the broth or stock and add the herbs; season with salt and pepper. Bring to a simmer and cook, whisking occasionally, until the flavors have come together and the gravy is thickened to your desired consistency, about 10 minutes; I prefer my gravy a little on the thinner side—it thickens as it sits and cools anyway. If you overdo it and the gravy is a little too thick for your liking, just whisk in a little more broth/stock.

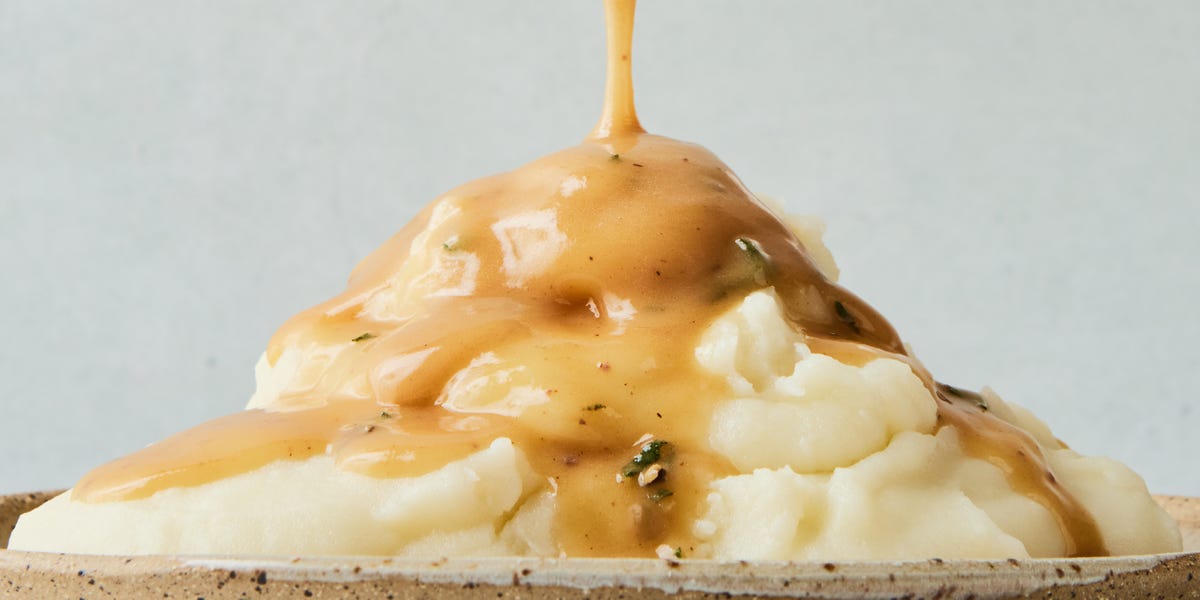
And there you have it: a rich, velvety gravy, with layers and layers of deep umami flavor, just waiting to be poured over mashed potatoes, roast turkey, or anything you like.

Full list of ingredients and directions can be found in the recipe below.
Recipe Tips
- How to collect pan drippings: After you take the turkey out of the roasting pan, set a colander or fine-mesh sieve over a large bowl or another pan. Pour the contents of the roasting pan through the colander—the drippings you want to keep will end up in the large bowl. You can discard the bits left in the colander. If you’d prefer not to deal with the drippings (or want to make gravy without having to cook a turkey), check out our gravy without drippings recipe.
- What if I don’t have a full cup of drippings? If you’re short on drippings, just add more stock. The reverse is also true: If you have more than a cup of drippings, use that and reduce the amount of stock in equal proportion.
Perfect Gravy Variations
If you’re looking to amp up your gravy’s flavor even more, you’ve got options. Roasted garlic is a no-brainer and requires basically no effort: Simply lop off the top of a head of garlic, place it in foil, drizzle with olive oil, and wrap it up. Throw into your already-full oven alongside the turkey and stuffing until it caramelizes into sweet, tender cloves. Coarsely chop once cool and stir into the gravy with the herbs.
If you’re not a fresh herbs person, you can totally use dried, or swap out the thyme and sage for the same amount of poultry seasoning, rosemary, or even Italian seasoning.
If you’re gluten-free or vegetarian, our gluten-free gravy and vegetarian gravy will ensure that no one has to miss out on this holiday staple.
Storage
Gravy is perishable, so it will only last 2 days in the refrigerator; however, you can freeze leftover gravy up to 3 months in an airtight container or plastic bag. Thaw the gravy in the fridge the day before you plan to reheat it.